AutoQC Loader version 22.1.0.122 will not automatically upgrade to version 24.1.0.x. To install AutoQC Loader 24.1.0.x on a machine currently running version 22.1.0.122 or an older version, you must first uninstall the older version. Please follow the steps below to save your configurations, uninstall the older version, and install AutoQC Loader 24.1.0.x.
1. Export Configurations
- Launch AutoQC Loader 22.1.0.122 if it is not already running.
- Stop all running configurations.
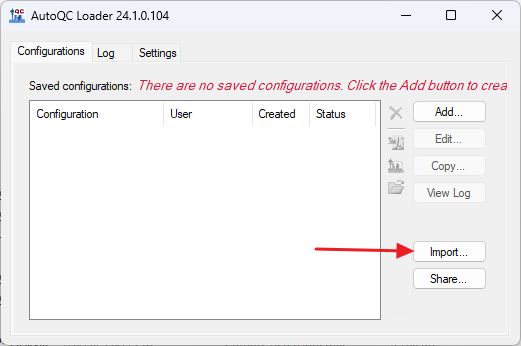
- Export the configurations by clicking the Share button.

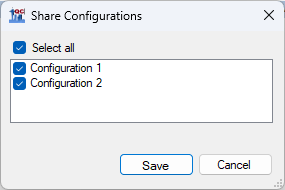
- Check Select All in the Share Configurations dialog, and click Save. Save the .qcfg file on your computer.
 2. Uninstall AutoQC Loader 22.1.0.122
BEFORE
 uninstalling AutoQC Loader it is important to:
- Stop all running configurations
- In the Settings tab uncheck Keep AutoQC Loader running

- Close the AutoQC Loader app by clicking the Close ('X') icon in the top right corner of the app window.
To uninstall:
- In the search box on the taskbar, type Control Panel and select it from the results.
- Select Programs > Programs and Features
- Find AutoQC in the list of installed programs. Right-click on "AutoQC". Select Uninstall or Uninstall/Change.
- In the AutoQC Maintenance dialog, select Remove the application from this computer, and click OK.
 2. Install AutoQC Loader 24.1.0.x


